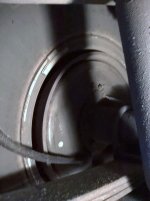
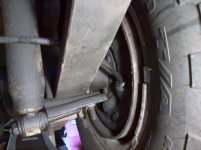
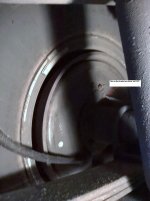
Sorry to hear about your brake failure. Not knowing what year and model your jeep is , I assumed from your avatar that it is a TJ with a Dana 35 ? You posted its a wheel cylinder so again assuming your jeep does not have rear disc brakes. Ok , first , wheel cylinders and brake calipers really should be changed in pairs as they wear together and will fail pretty close together. I've seen it before. Plan on swapping out both together. With the tire and drum off , you will have to disassemble the brake shoes and hardware. Hope you have the necessary tools for servicing rear brakes . I get by with electrical pliers and vise grips but you should have a few of the proper tools. Hold down washers are a little tricky and pull back springs are a little tough without the right tool to remove and replace. You won't need much to do rear brakes but having the right tools for them will save time , aggravation and your fingers. With the brakes disassembled , use penetrating oil on the brake line where it threads into the wheel cylinder from behind the backing plate. You may want to do this each day , starting days before you plan on doing the job. This area is known to accumulate surface rust. Especially the brake line. To remove the brake line , you should have the proper size flare wrench , an open end will strip the threaded nut that is supposed to spin on the brake line. When using penetrating oil on the line , wet the threads into the cylinder and the line where it goes through the nut. Remember , it must spin on the line. If not , the line will twist when you break the torque of the nut to the wheel cylinder. Vise grips will work but apply too much pressure which squeezes the nut and causes binding on the line and will not let the nut spin freely on the line as it should. You really want to break up that rust and want the nut lubricated well to unthread from the wheel cylinder and to spin on the brake line. You don't want to wreck a good brake and make another job for yourself. Do check the line for rust and rot as well . Sometimes the need to be replaced as they will spring leaks . Happens to older vehicles , but may also happen to jeeps if you encounter mud , water crossings and get dirt all over the undercarriage and do not clean it often enough . Once the nut spins freely ( thank you Jesus) , you can remove what secures the wheel cylinder to the backing plate. Older vehicles had spring clips that held the cylinder to the backing plate but you should find two small bolts . And yes , you want to pre-lubricate the bolts when you begin days before using penetrating oil on the line . This will make the job go faster and hopefully life easier to. Once removed , clean the area with a wire brush but take care to plug the brake line with an appropriate size plug if you can to avoid losing brake fluid and making a mess for yourself to work in . Please do be prepared with a can of brake cleaner spray. Large cans are better ( a little pricey) but we tend to get happy with them and you have to do two sides. Thread the brake line into the wheel cylinder first but not tight yet . Then , thread the bolts back through the backing plate into the wheel cylinder . Now you may properly tighten but not over tighten the bolts and line nut. A word about threads ; if you do not have , please get anti-sieze compound and apply lightly to all threads bolts and line nut. Do not get any into the wheel cylinder , just the outer edge of the threads where it threads into the wheel cylinder and a little on the line where the nut spins over it. You may have to go back in and disassemble this someday for another reason and thank yourself you took this precaution toward easy disassembly. Also, it is a good idea to apply lightly anti-sieze compound to the threads of the bleeder screw where it threads into the wheel cylinder. Lightly so as not to et any into the wheel cylinder. Tighten mounting bolts first and line second. Reassemble brake shoes and hardware . Installation reverse of removal. Lubricate the self adjusting star wheel threads with lithium grease or what's recommended at the parts store. Lubricate the contact points on the backing plate ( usually 3 points per brake shoe) so brake shoes do not bind. Feel free to lightly lube any part that will move when brakes are applied . Self adjusting hardware , spring attaching ends , anything that will move upon brake application . Adjust star wheel self adjuster so brake drum just slightly rubs on brake shoes but does not bind or drag. You may have to grind down the lip on the outer edge of the drum to make brake drum removal and replacement easier , the inner lining surface wears the drum but not the outer edge making removal and replacement of drum harder. You could adjust the star wheel to get shoes out to drum but trial and error fit taking drum on and off and clicking star wheel to expand shoes but your supposed to access star wheel from behind backing plate with a brake adjusting tool ( brake spoon) . An oblong rubber plug usually plugs the access hole . Replace to prevent infiltration of water and dirt . Enough water and dirt get into you brakes , why help it to get more ? Finally , you MUST bleed the new wheel cylinders of air . A mity-vac pump works well but a second person to step on the brake pedal to force out air and confirm all that escapes is DOT 3 fluid ( check owners manual) and no more air. To bleed ; top off master cylinder first. Have assistant pump brake pedal until pedal gets as firm as it can . It won't get too firm , there is air in the line and cylinder. When assistant get pedal firm as possible , hold pedal as you open bleeder screw. Don't get splashed ! Assistant MUST hold pedal down until you tighten bleeder screw. If not , air will get sucked back into brake system . As soon as you see the air come out and fluid with it and pressure starts to die down , tighten bleeder screw . Repeat this step until your certain only fluid escapes and air is no longer present and brake pedal firm. Repeat other side. Forgot to mention , before assembling wheel cylinder to backing plate , clean off backing plate where brake parts attach to with brake cleaner and wire brush. You want everything clean but do not wash off any applied lithium grease or anti-sieze compound you just applied . This all sounds tricky but work methodically and you will make sense of this whole procedure. Yes , of course a good repair manual is gold. You'll want a reference so you don't get stuck in the middle of the job. You must remember where parts go back upon reassembly to avoid improper reassembly. Take a picture before disassembly . It really helps. You'll be surprised. Best of luck to you . Stay safe. Greg

