You are using an out of date browser. It may not display this or other websites correctly.
You should upgrade or use an alternative browser.
You should upgrade or use an alternative browser.
Heater Blower Upgrade
- Thread starter Turbogus
- Start date
Last night I took the 3 1/4" hole saw (I have no calipers at home) and it fit snugly into the existing hole. :redface: This tells me that a P.O. likely tried this upgrade before with a substandard blower motor, the label was painted over and even acetone didn't work to reveal where this existing fan came from. Notwithstanding, I have a new Made in The Great White North arriving today so I'll install and see where I stand. In the meantime I have a new aluminum jig prepared mentioned on the Terry Howe page so if anyone is interested for the cost of postage, I can mail this to you for your upgrade.
Last edited:
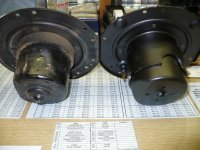
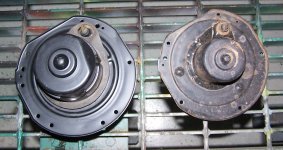
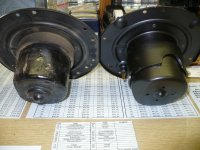
Okay gang, got the 4 Seasons motor and it's configured like the one on the right;

and while the relief for the motor on the left is 3 1/4" (firewall hole) the one on the left has that steel collar, lacking a set of calipers does anyone know the dimension of this type of motor with the steel collar?
Thanks and a lift of the lynch lid for any responses.

and while the relief for the motor on the left is 3 1/4" (firewall hole) the one on the left has that steel collar, lacking a set of calipers does anyone know the dimension of this type of motor with the steel collar?
Thanks and a lift of the lynch lid for any responses.
Last edited by a moderator:
Got the hole hogged out last night despite this head cold, used the aluminum jig as described in the article but, given the nature of the only metal hole saw I could find, the jig broke just as the saw was beginning to bite. Luckily it had scored the metal enough to see where I had to grind relief, so got out my trusty Dremel (I've used this thing on the Jeep more times than I can remember) with a titanium cutting/gringing bit and ground the relief in about 10 minutes. Smoothed out with a half round file. Today at work, if I'm up to it during my lunch I'll be installing the "Made in China" heater core and Made in Canada blower motor and seal it all up. Will keep everyone posted.
Update uhhh! That Autozone "Made in China" heater aluminum core is not up to spec! The core frame is correct but the core itself appears at least one row thinner! Got a copper core one coming on the truck from NAPA. Damm just like the hilarious home videos with the reporter Nick Poppendaddi and the panda that bites and eats him on Robot Chicken "You just can't trust the Chinese" :roll:
... and NO I do not mean this as racist, just a correlation.
Last edited:
Update: Got the brass/copper heater core and looking it over I found that the reason my old core had sprung a steam leak is that the top bracket that's brazed to the core had broken loose, this allowed the core to move around where the top tank (firewall side) had abraded against the heater box enclosure. Looking at the new core and the brazing looks better'n the old one. Glad the local shop chief was able to find one of these, he like myslef are disdianful of aluminum radiators and thier inherent fragility not only from physical damage but from electrolysis of the coolant over time. For as long as I can find them, I'm sticking with the 'old school' brass copper radiator and heater cores.
Also when lubing the internal cable I noticed how the cable end was secured with a 'push nut' after I reassemble the box into the Jeep going to get some and secure those slipping cable ends once and for all.
Also when lubing the internal cable I noticed how the cable end was secured with a 'push nut' after I reassemble the box into the Jeep going to get some and secure those slipping cable ends once and for all.
Finally got the heater box shoved against the firewall. After more than a few attempts I remembered that one must start with the bolt hole (positioned at 11:00 from the heater motor when looking aft) and press the heater box in and up to get that bolt to protrude through the firewall, then the rest go right in.
Finally!!!!! Got it all completed! Caught the flu for the last several weeks so my inner mechanic was out of commision. The new motor seems to push more air and I just discovered yesterday the defroster duct cable wasn't pulling the duct flap fully, which would explain minimal results at the defroster registers upon 1st inspection. Going to have another look later.
frhrwa
New member
"You just can't trust the Chinese"
amen.. STOP buying chinese shit!
Similar threads
- Replies
- 4
- Views
- 3K
- Replies
- 6
- Views
- 9K
- Replies
- 61
- Views
- 57K


